Within ControliQ Task Groups and Outcomes allow you to report on a collection of tasks as a single line item with the option to expand the data to an individual task level if required.
You could use a Task Group If you want to see how much work has been done servicing customer queries, where queries account for several different Core Tasks.
You could use an Outcome if you want to understand the average effort that is being output for each customer query completed.
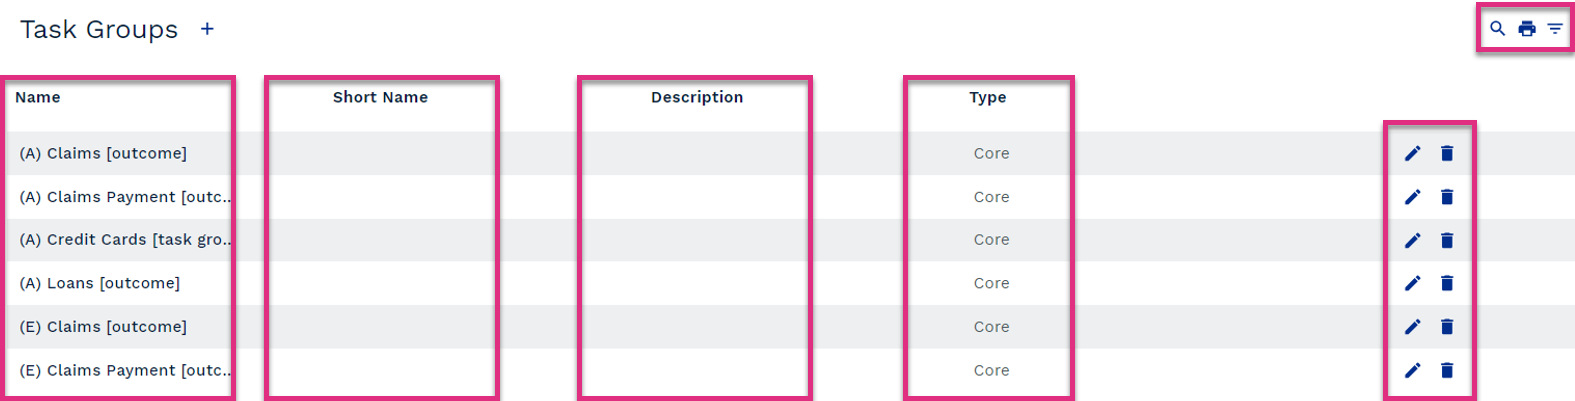
When you select the Task Groups link within the Add/View section of the Admin screen you will see a list of all of the Task Groups and Outcomes that have already been created.
Name
Displays the name of existing Task Group or Outcome.
Short Name
Displays a shortened version of the Group or Outcome name if one was added during setup.
Description
Displays a description relating to the Task Group or Outcome if one was entered during setup.
Type
Displays the Type of task the Group or Outcome relates to either Core, Diverted or Downtime.
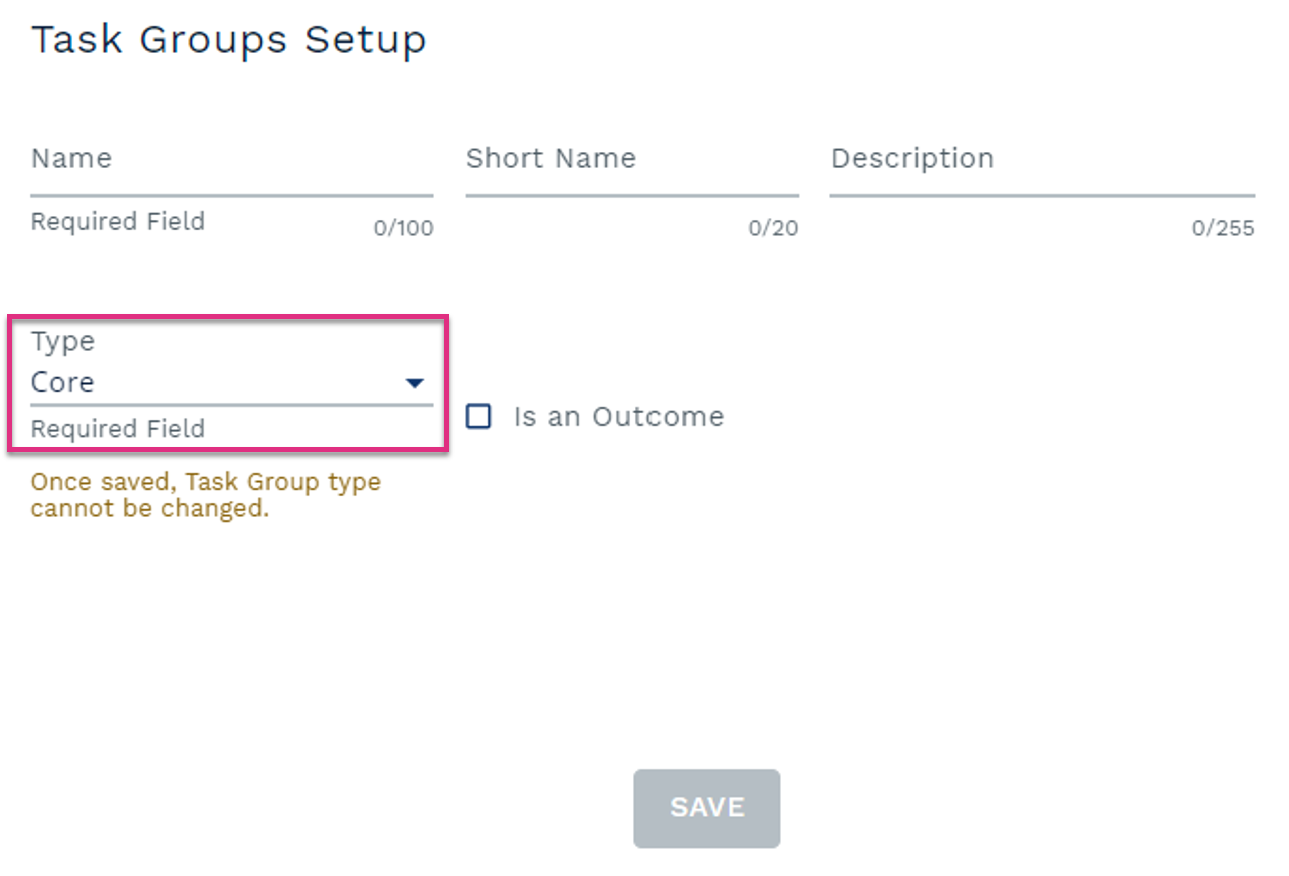
Please note that only Core Task Groups can be enabled as Outcomes.
Selecting the search icon will allow you to refine the list of Groups and Outcomes displayed. You can search by partial or full Group or Outcome names.
Click the print icon to print a list of the existing Groups and Outcomes.
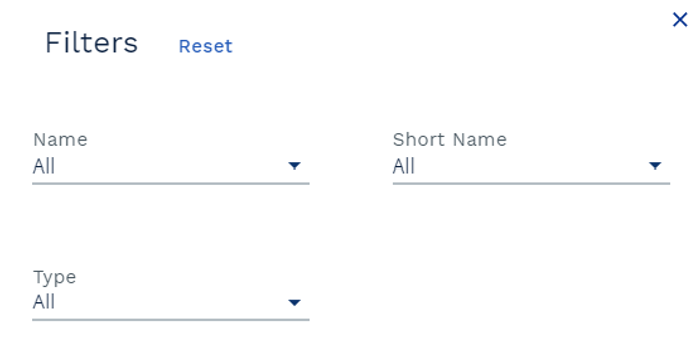
Click the Filter option to refine the list of Downtime categories displayed by key attributes. To utilise the Filters option, select the attribute that you would like to filter by from the drop-down menu in the pop-up box.
To edit an existing Group or Outcome, click the pencil icon next to its name to open the setup dialogue box.
To delete an existing Group or Outcome, select the trash can icon.
Please not that to delete a Group or Outcome you must unlink all tasks or task groups from it first.
To create a Group or Outcome, select the icon next to the Task Groups table header. This will prompt the Task Groups setup form to open.
Name
Enter the name of the Group or Outcome here (up to 100 characters).
This option only appears if the Core type is selected. Selecting the checkbox will prompt an additional field to appear where you can select the core task that indicates 1 of these outcomes has been completed.
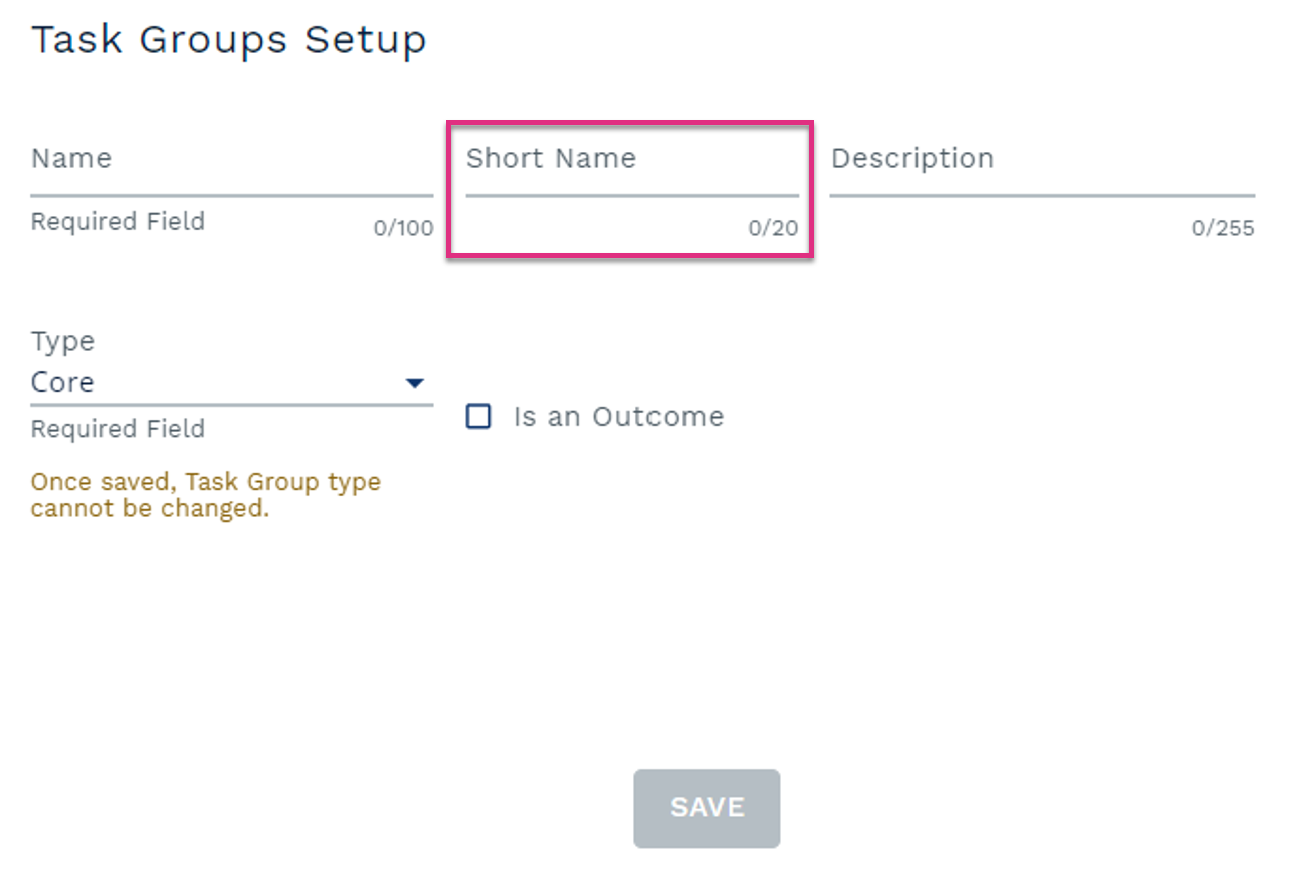
Short Name
This function will be applied to future development.
This option only appears if the Core type is selected. Selecting the checkbox will prompt an additional field to appear where you can select the core task that indicates 1 of these outcomes has been completed.
Description
You can add a description (up to 255 characters) to a Group or Outcome.
This option only appears if the Core type is selected. Selecting the checkbox will prompt an additional field to appear where you can select the core task that indicates 1 of these outcomes has been completed.
Type
Select the type of task you would like to group together either Core, Diverted or Downtime.
This option only appears if the Core type is selected. Selecting the checkbox will prompt an additional field to appear where you can select the core task that indicates 1 of these outcomes has been completed.
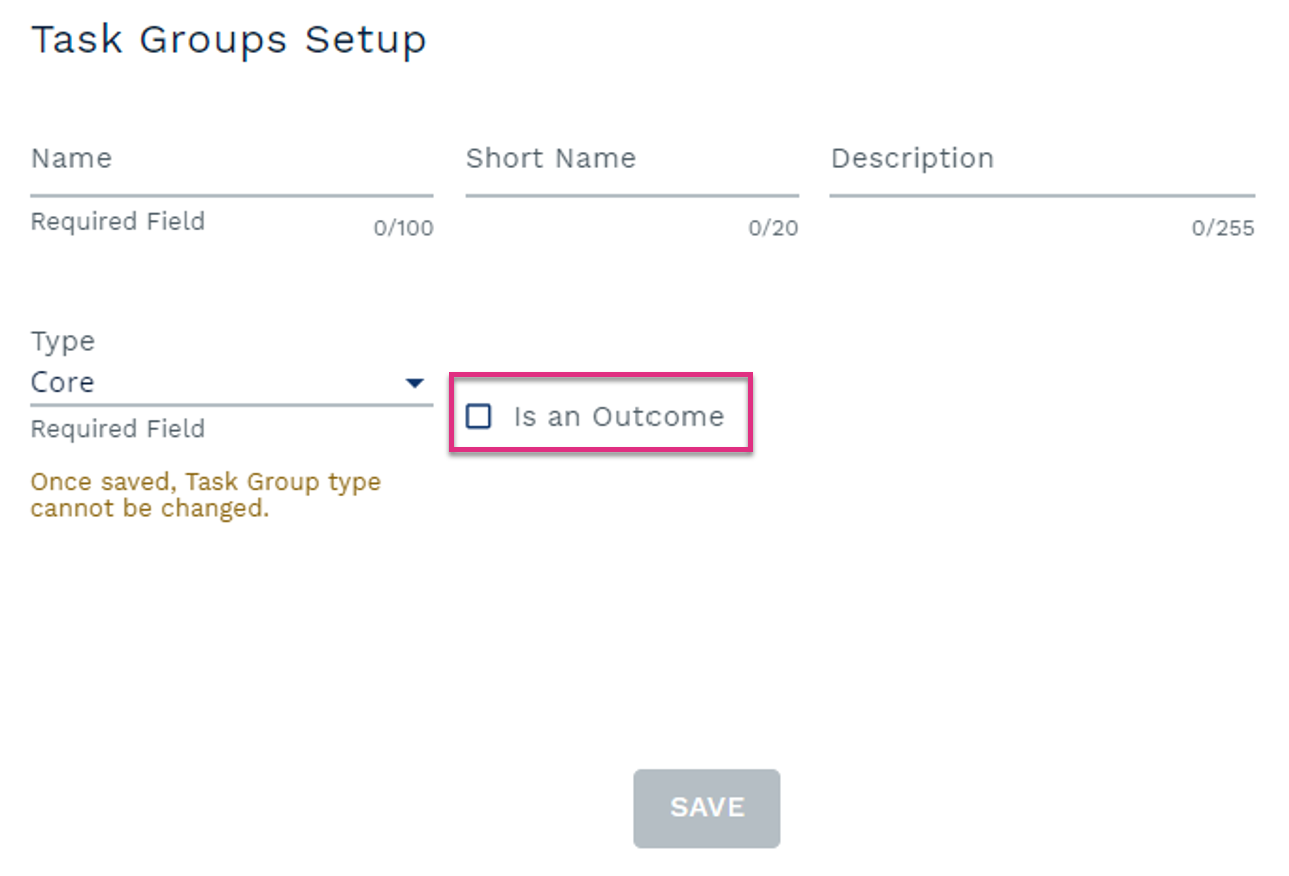
Is an Outcome
This option only appears if the Core type is selected. Selecting the checkbox will prompt an additional field to appear where you can select the core task that indicates 1 of these outcomes has been completed.
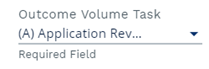
To specify the task that indicates one of these Outcomes has been completed select the core task from the Outcome Volume Task drop-down menu.
Once tasks have been linked to the Outcome you will be able to view data relating to the average effort per outcome in the Outcome View report.
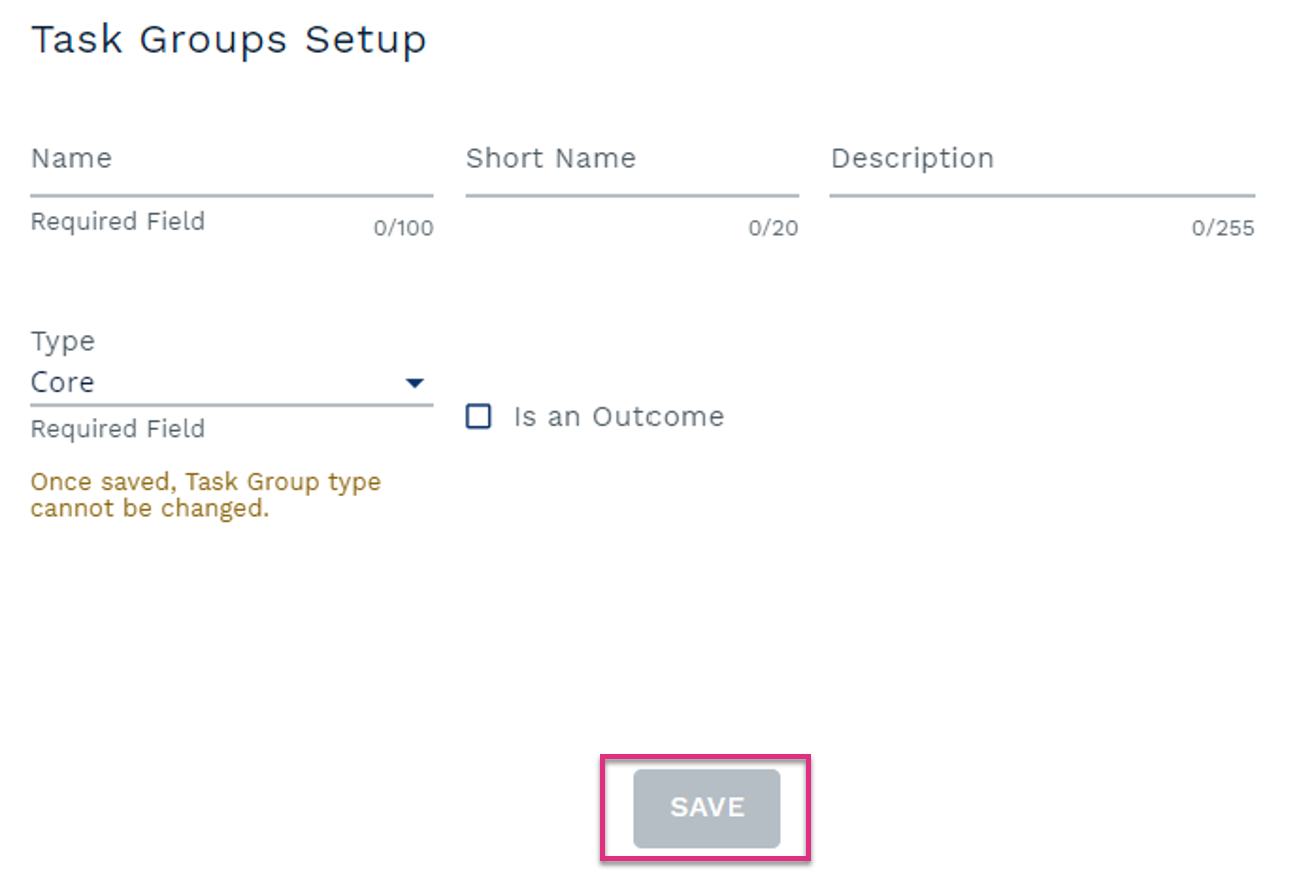
Save
Click here to save a new or edited Group or Outcome.
This option only appears if the Core type is selected. Selecting the checkbox will prompt an additional field to appear where you can select the core task that indicates 1 of these outcomes has been completed.
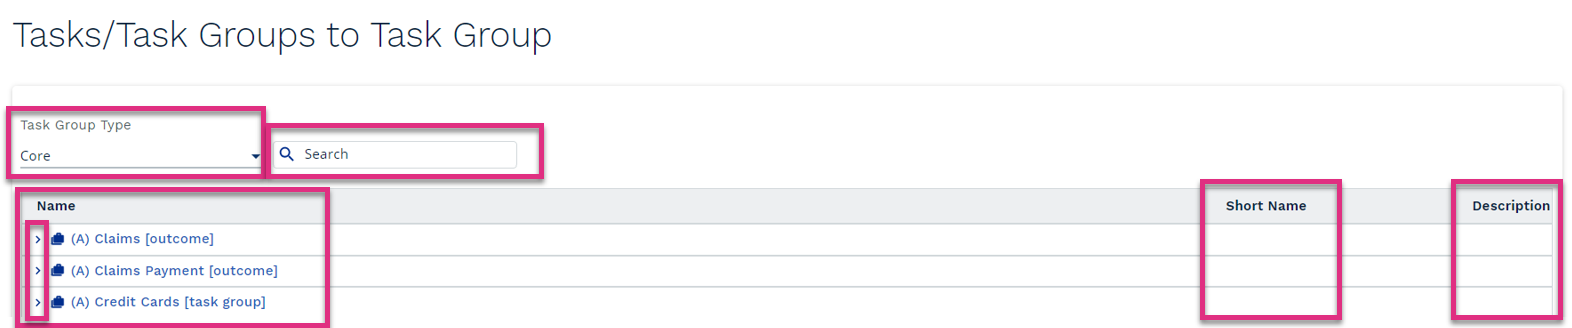
Once you have created your Group or Outcome you will need to link the required tasks or task groups to it. Selecting the Task/Task Groups to Task Groups link in the Assign section of the Admin screen will allow you to assign or unassign items from your Group or Outcome.
Task Group Type
Select the type of Group or Outcome that you want to assign or unassign items for by selecting either Core, Diverted or Downtime from the drop-down menu.
Search
You can refine the list of Groups or Outcomes displayed by searching using a full or partial Group or Outcome name.
Expand
Groups or Outcomes with items linked to them will display a icon next to their name. Clicking this will expand the view to display the items linked to this Group or Outcome.
the single briefcase icon indicates that the linked item is a task.
the double briefcase icon indicates the item linked is a Group or Outcome allowing for reporting across multiple layers.
Name
Displays the name of the Group or Outcome.
Short Name
Displays any short names that have been added to Groups, Outcomes or linked items during their setup.
Description
Displays any descriptions that have been added to Groups, Outcomes or linked items during their setup.
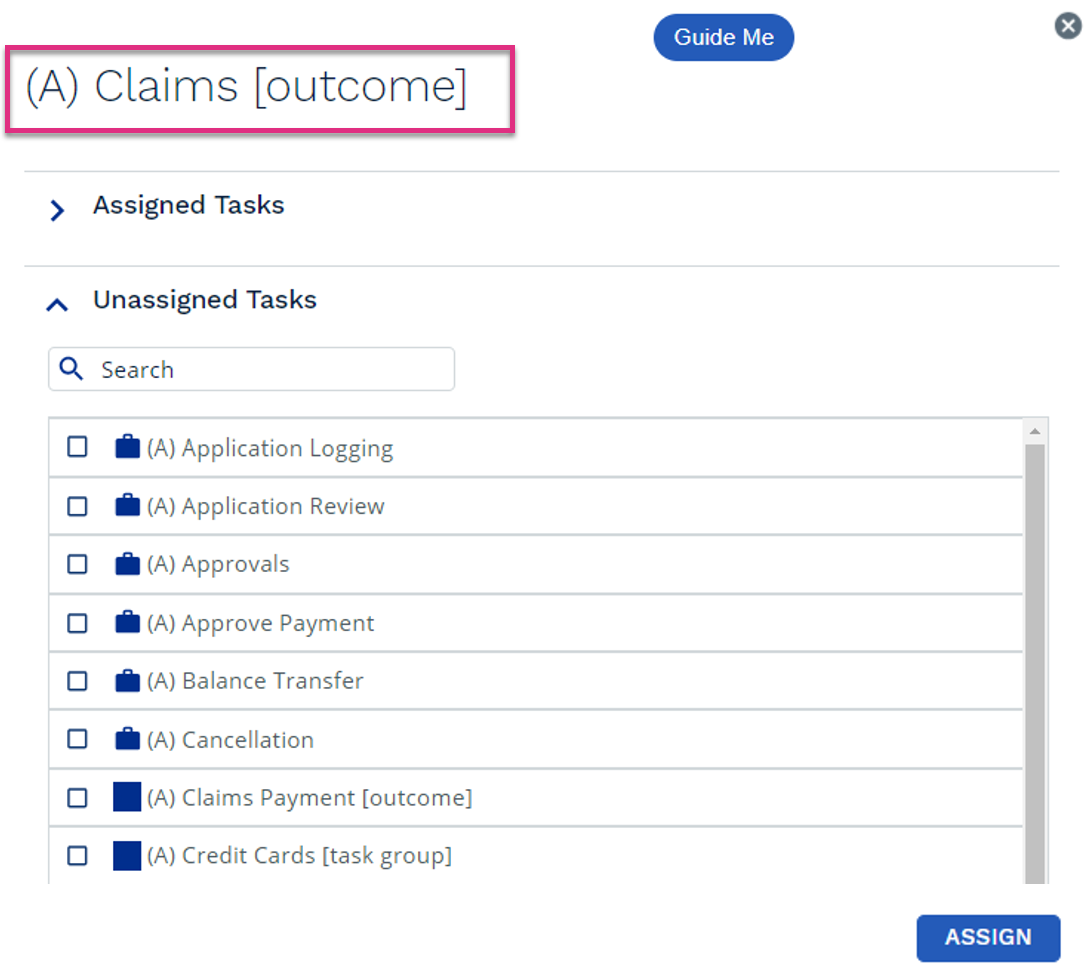
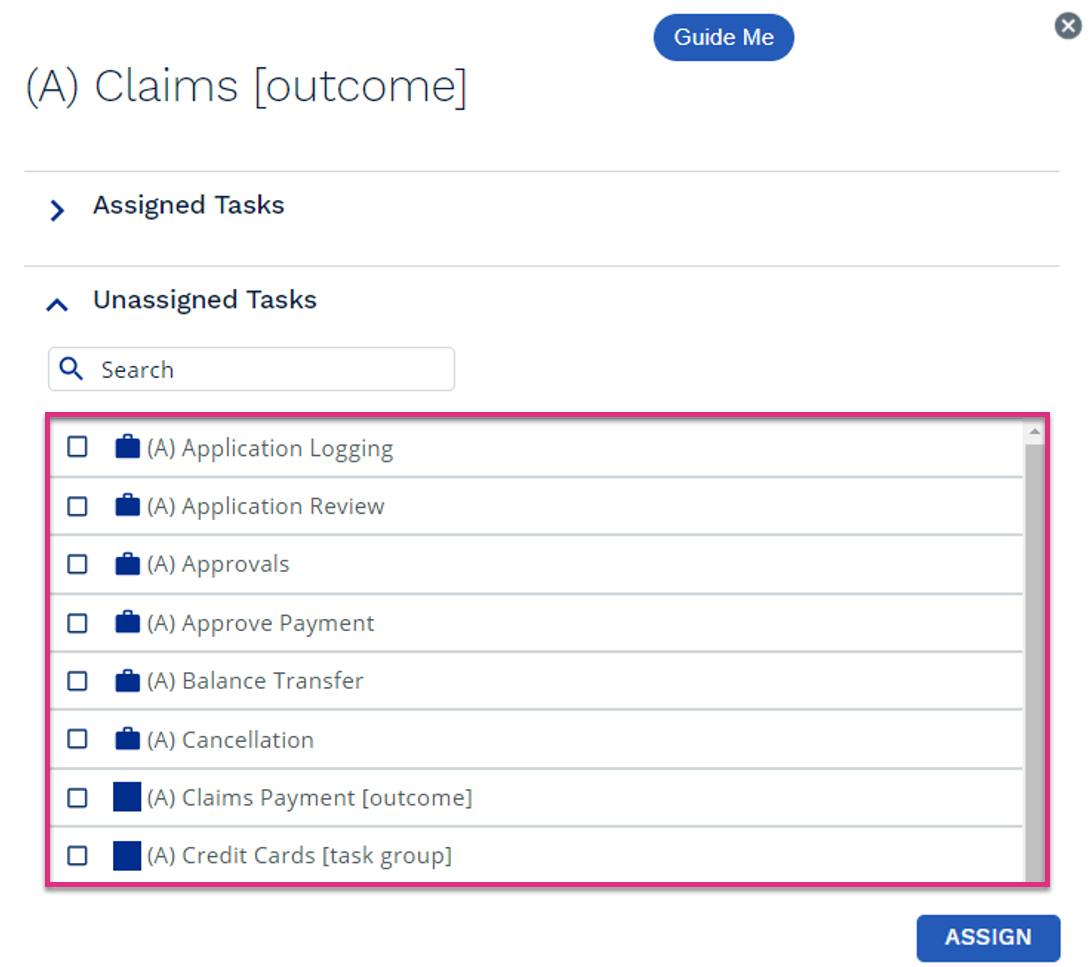
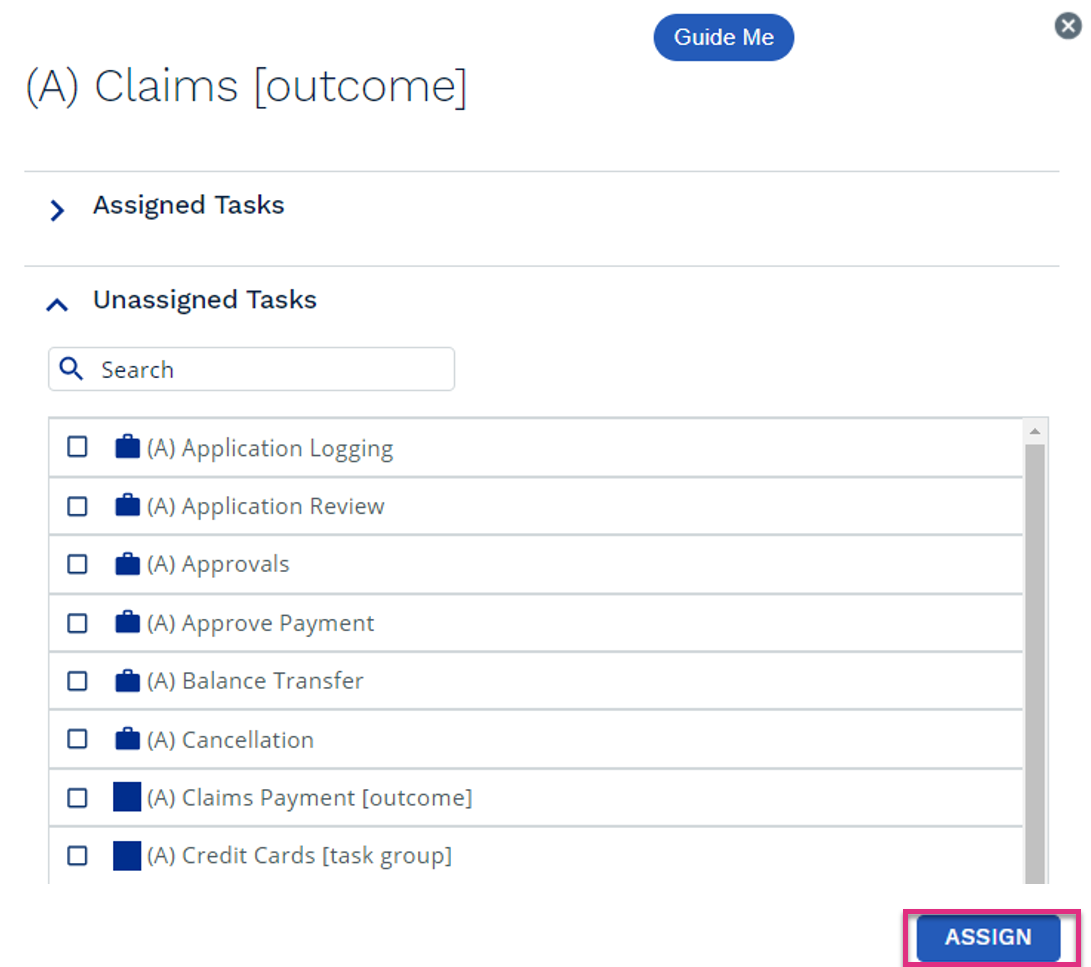
To assign or unassign items from a Group or Outcome click on the name of the Group or Outcome. This will prompt the assign/unassign screen to open.
Group / Outcome Name
Confirms the name of the Group or Outcome you are reviewing / editing assigned items for
Search
Allows you to refine the list of displayed items using full or partial item names.
Confirms the name of the Group or Outcome you are reviewing / editing assigned items for
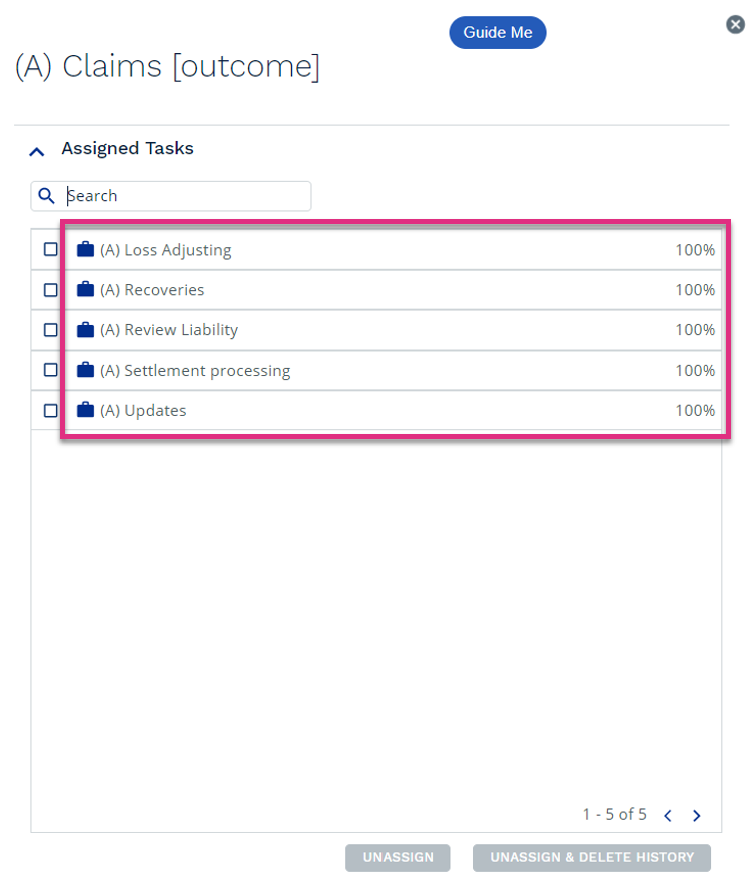
Assigned Task List
Confirms the items that are currently available to be assigned to your selected Group or Outcome
The briefcase icon next to an item name indicates that this is an assigned task.
The square icon next to an item name indicates that this is an assigned task.
Unassign / Unassign and Delete History
If you would like to unassign a currently assigned item you select the checkbox next to the item name. This will prompt the unassign options to appear.
Selecting this option will unassign the item but the historical Group or Outcome data will continue to display the contribution this item made during the time it was assigned.
Selecting this option will unassign the item but the contribution this item made to the Group or Outcome will be removed from all historical data.
Unassigned Items
Name
Confirms the name of the Group or Outcome you are assigning items to.
Confirms the items that are currently available to be assigned to your selected Group or Outcome.
Search
Allows you to refine the list of displayed items using full or partial item names.
Confirms the items that are currently available to be assigned to your selected Group or Outcome.
Assigned Task List
Confirms the items that are currently available to be assigned to your selected Group or Outcome.
The briefcase icon next to an item name indicates that this is an assigned task.
The square icon next to an item name indicates that this is an assigned task.
.
Assign
To assign an item to a Group or Outcome select the checkbox next to the items name and click the assign button
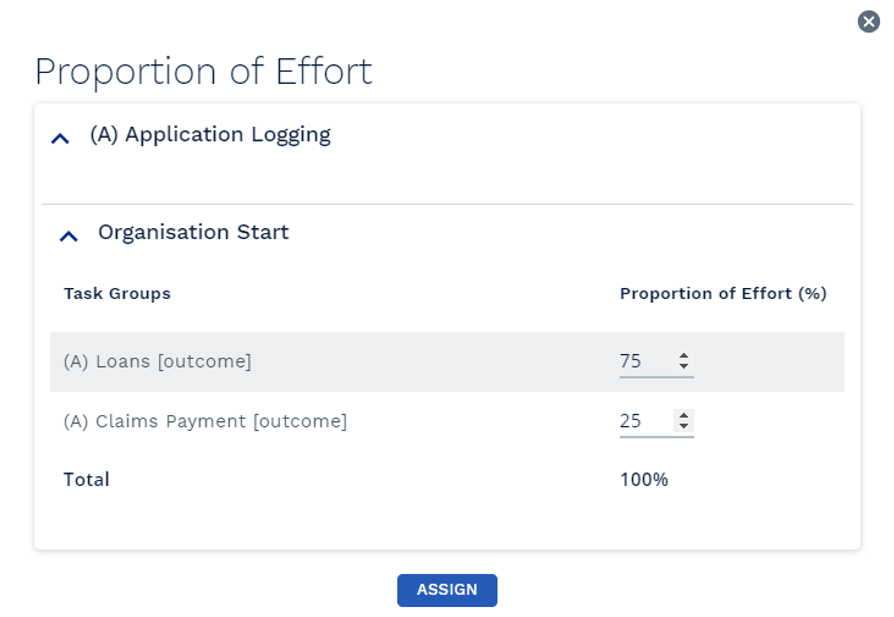
If the item, you are assigning is another Group or Outcome the link will be made immediately.
If the item, you are assigning is a task that is the only assigned to this Group or Outcome the link will be made and the proportion of all work for this item relating to the selected Group or Outcome will be set by default as 100%.
If the item you are assigning is a task that is linked to more than 1 Group or Outcome a pop-up box will appear where you will add the proportion of total work that relates to each Group or Outcome. The combined total of each allocation must equal 100%.
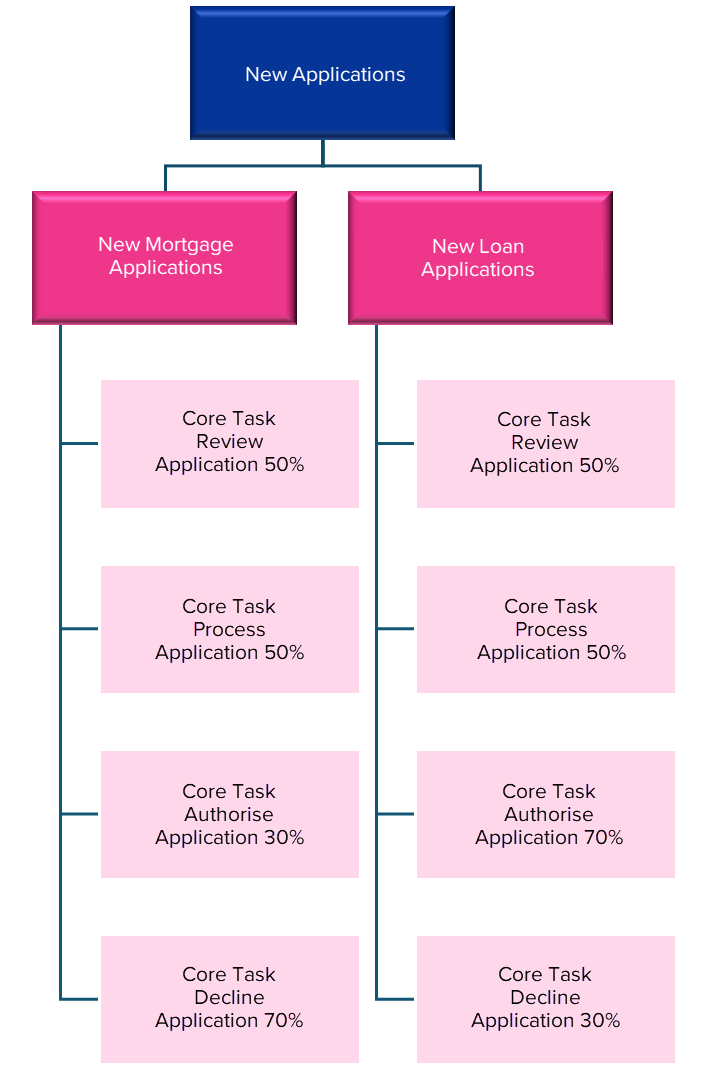
The ability to assign Groups/ Outcomes to Groups / Outcomes allows you to report across multiple layers. For example, you may have an Outcome to understand the average effort required to complete New Applications but would also like to know the average effort required to complete a New Mortgage Application and a New Loan Application. Creating Outcomes for each of these would allow you to view data at each of the 3 levels.


 icon next to the Task Groups table header. This will prompt the Task Groups setup form to open.
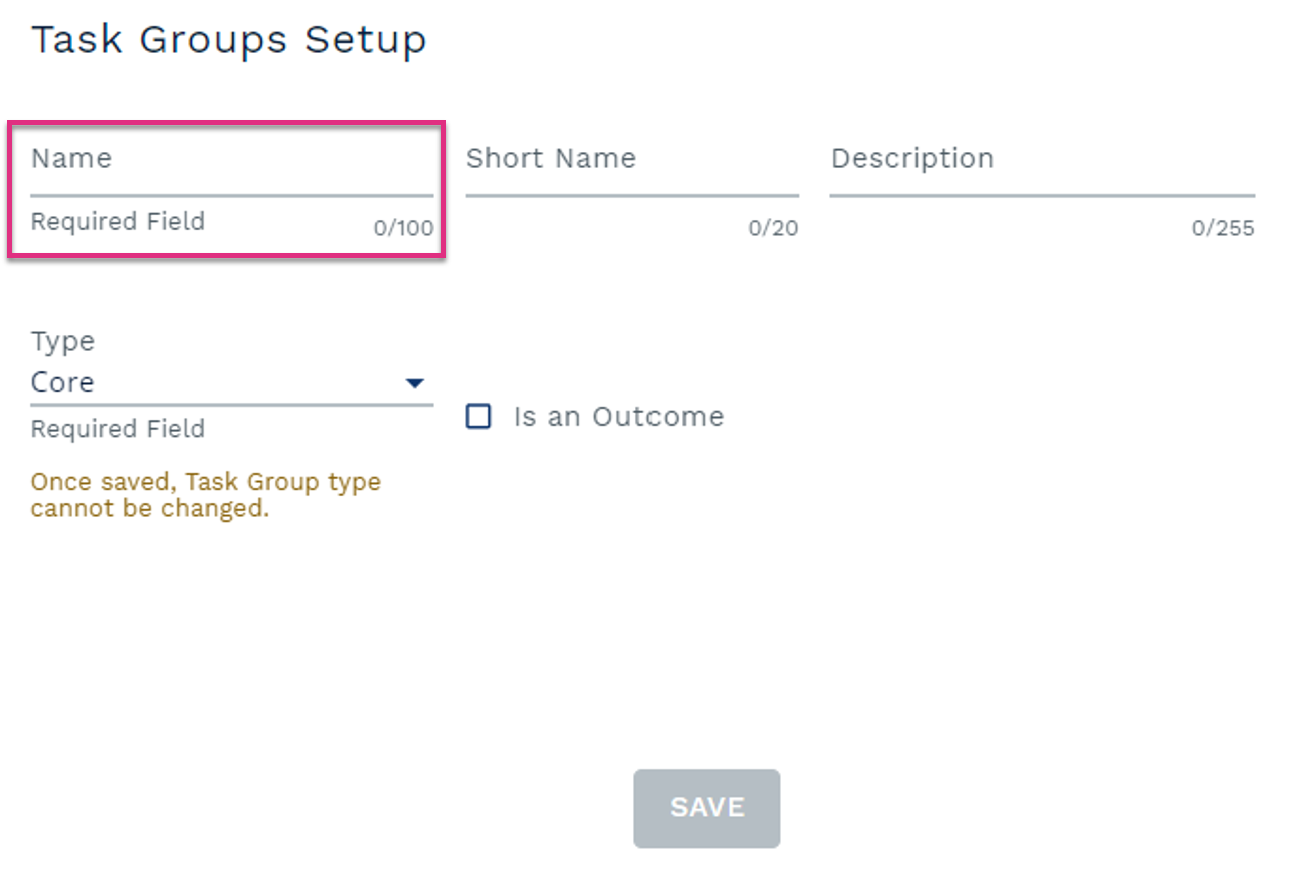

 icon next to their name. Clicking this will expand the view to display the items linked to this Group or Outcome.
 the single briefcase icon indicates that the linked item is a task.
 the double briefcase icon indicates the item linked is a Group or Outcome allowing for reporting across multiple layers.
 The briefcase icon next to an item name indicates that this is an assigned task.
 The square icon next to an item name indicates that this is an assigned task.